
When you upgrade your current version of Windows to a newer version, the upgrade process will create backups of important directories from your previous version of Windows. These directories include your user profiles, Windows folder, Program Files directory, and other important locations. These backups are then stored in two folders called Windows.old and $Windows.~BT, which can be used after the upgrade to recover any data that may not have been properly migrated over to the new version of Windows. These two folders, though, can use up a significant amount of hard drive space on your computer. Therefore, if you are sure you no longer need any of the files in those folders and all of your data and apps have been migrated successfully, it is a good idea to remove these two folders to reclaim that space for other programs to use.
To delete these folders you can use a Windows tool called Disk Cleanup. To access Disk Cleanup, type cleanmgr in the search field of the Windows Start Menu or on the Windows 8 Start Screen. When the search result appears as cleanmgr.exe or Disk Cleanup, please click on that result to launch the program.
When the program launches it will perform a scan of your computer's hard drives to determine what files can be cleaned up and how much storage space they use.
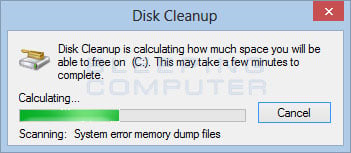
It may take a few minutes to scan your drives, so please be patient. When it is done you will be shown the Disc Cleanup screen.
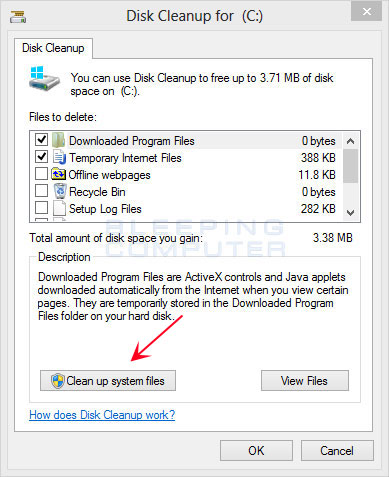
The default Disk Cleanup screen does not allow you to remove system files, so we need to enable those options first. To enable them click on the Clean up system files button as indicated by the red arrow in the image above. When you click on this button, the Disk Cleanup program will restart and scan your hard drives again. When it is finished scanning the Disk Cleanup program will open again, but this time with some extra options that you can select as shown in the image below.
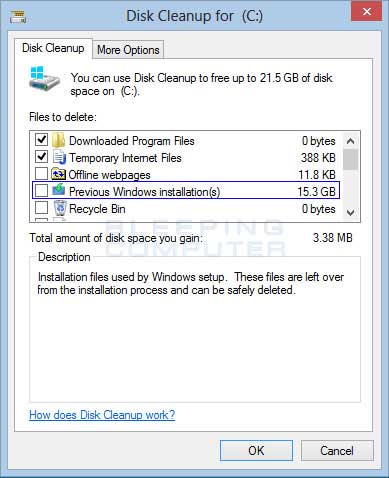
As you can see you can now see a Previous Windows installation(s) option that you can select. This option refers to the Windows.old and $Windows.~BT folders that we discussed earlier. If you scroll down you will also see another option labeled Temporary Windows Installation Files, which corresponds to temporary files that were left over from when you installed the new version of Windows. As we no longer need these files, we will remove them as well.
To remove the Windows.old, $Windows.~BT, and windows install files put a check mark in the optioned labeled Previous Windows installation(s) andTemporary Windows Installation Files. Then click on the OK button. The Disk Cleanup wizard will now ask if you are sure you wish to permanently delete these files.
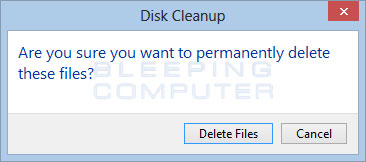
If you are sure you wish to delete the files, click on the Delete Files button. The Disk Cleanup wizard will now begin the process of deleting the selected files and data from your computer.
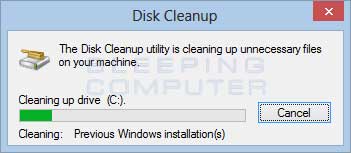
If there is a lot of data to delete, please be patient while they are removed from your hard drive. Once the files have been removed, the Disk Cleanup program will automatically close. The Windows.old, $Windows.~BT, and the Windows temporary installation files have now been removed from your computer.
If you have any questions regarding these steps, please ask us in the Windows 8 Forum.
No comments:
Post a Comment