
Table of Contents
- How to connect to a Wi-Fi or Wireless Network
- How to connect to a Wi-Fi or Wireless network that is not broadcasting its name or SSID
- Deleting a Wi-Fi connection profile so the Surface wont automatically join it
- Troubleshooting
This section will explain how you can connect Microsoft Surface to a Wi-Fi or Wireless network that is broadcasting its name or SSID. Most public and private wireless networks broadcast their SSID so that people can easily find and connect to them. If you wish to create a manual wireless connection for a network that is not broadcasting its name, please see the instructions here.
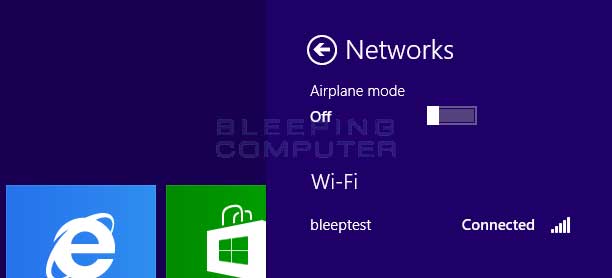
On the Surface, slide your finger to the left from the right side of the screen. This will open the Windows Charm Bar. Now click on the Settings option. When the Setting charm opens you should see a screen similar to the following image.
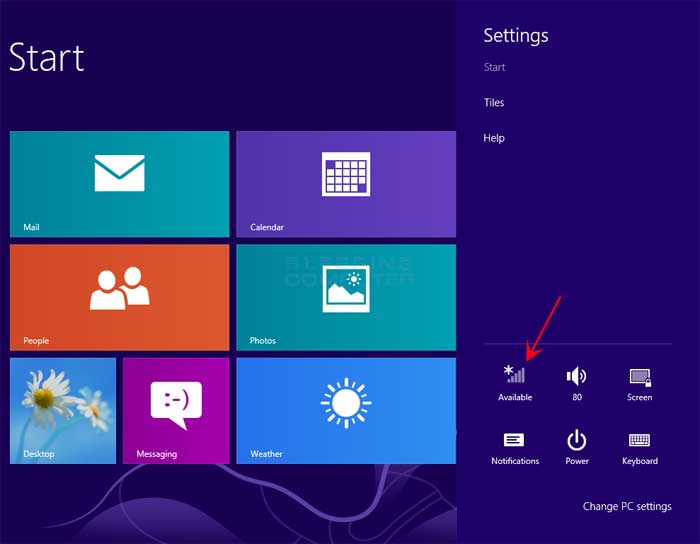
Click on the wireless icon as designated by the red arrow in the image above. This will open a screen that shows the network you are currently connected to and other networks that are in range.
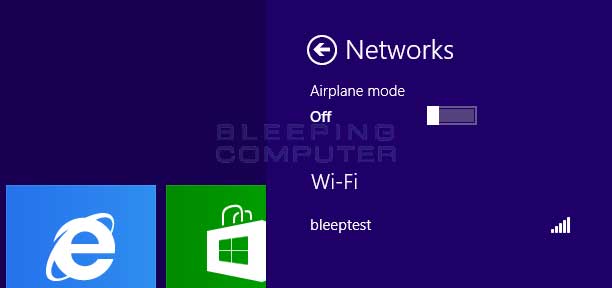
Tap on the available network that you wish to connect to. Windows will then ask if you wish to connect automatically each time this connection is available.
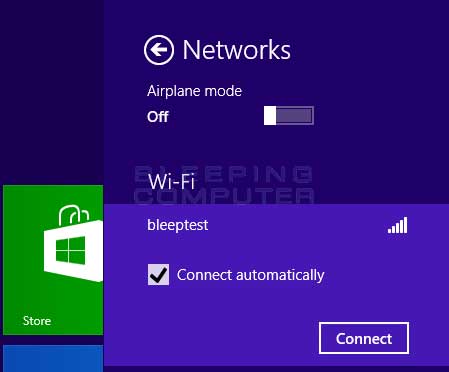
Put a check mark in Connect automatically and then press the Connect button. You will now be prompted to enter the password, or network security key for this network.
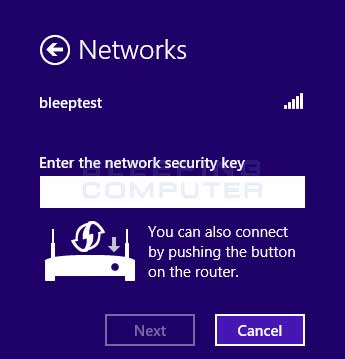
Enter your wireless network password and then click on the Next button. Surface will now ask if you wish to allow sharing on this network.
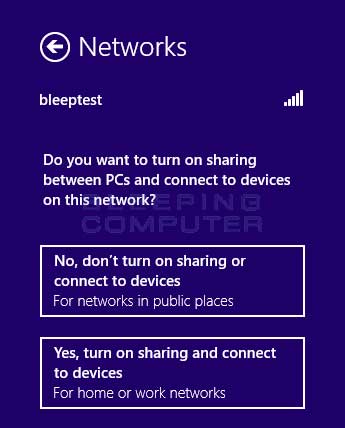
If you are on a public network, click on the No, don't turn on sharing or connect to devices so that your data is not shared to the rest of the network. If you are on your home network, then you can click on Yes, turn on sharing and connect to devices so that other devices can access any data that you share on the Surface.
You will then be back at the wireless network selection screen and connected to the network you selected.
For security, there are some wireless networks that do not broadcast their SSID or name. This makes it so that the wireless network is not displayed when you are browsing the list of available networks. In order to connect to one of these types of networks you will need to create a manual wireless connection. To create a manual wireless network, please follow the steps in this section.
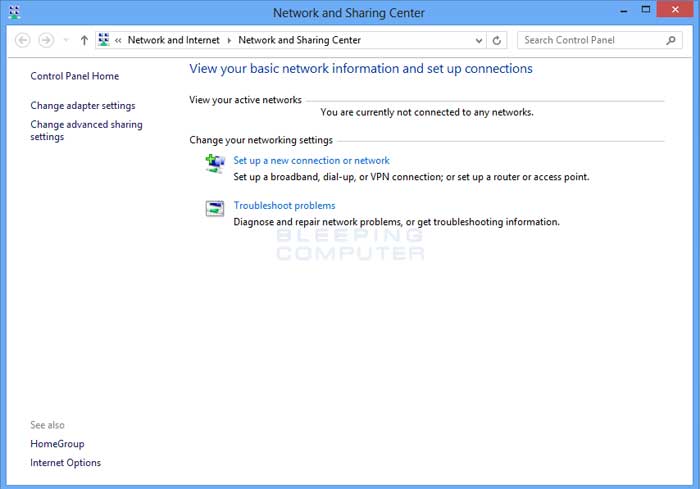
From the Surface Start Screen, type View network status and when the search results appear, click on the Settings category. Under the settings results, please click on the View network status and tasks option. This will open the Network and sharing center control panel as shown below.
Please click on the Set up a new connection or network and you will be shown a screen prompting you for what type of network you wish to connect to.
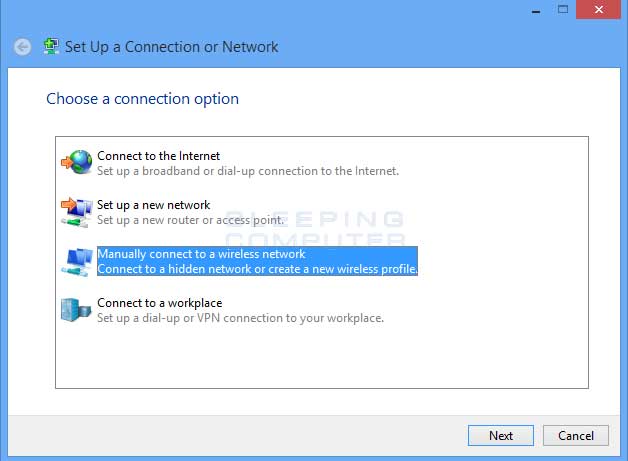
Click on the Manually connect to a wireless network option and then click on the Next button. You will now be brought to a screen where you can input the required information necessary to create manual wireless network connection.
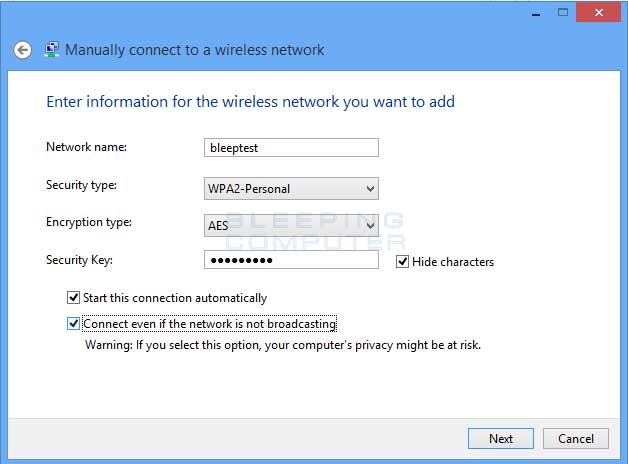
As shown in the image above, fill in the required information and make sure to put a check mark in the Start this connection automatically andConnect even if the network is not broadcasting options. Then click on the Next button.
You will now be shown a confirmation screen that states that the manual wireless connection has been created.
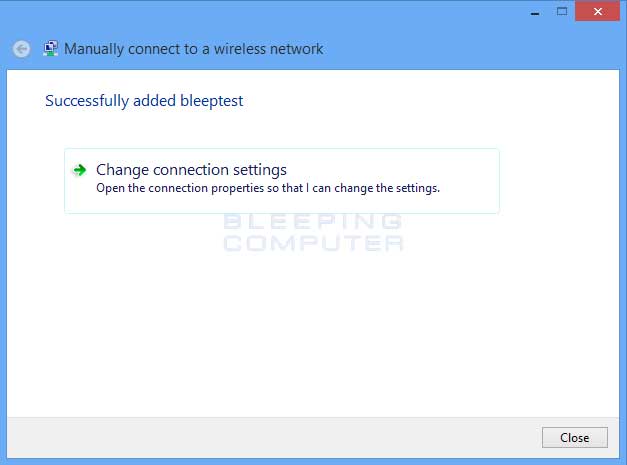
Click on the Close button and Surface should automatically connect to this network when it is available.
In the future if you wish to forget this network so Surface no longer automatically connects to it, you can follow the steps in the next section.
If you are connected to a wireless network and would no longer like to connect to it automatically, you can tell Surface to forget it. To do this, swipe in from the right side of the screen so the Charm bar opens. Then click on the Settings option. When the Setting charm opens you should see a screen similar to the following image.
Click on the wireless icon as designated by the red arrow in the image above. This will open a screen that shows the network you are currently connected to and other networks that are in range.
Right click on the network you wish to forget and a menu will appear.

Click on the Forget this network option and you will be disconnected from the wireless network and will not automatically connect to it when it's available.
When trying to connect and use a wireless network, problems can unfortunately occur. This section will offer troubleshooting tips that you can use to resolve your wireless connectivity on Surface.
What to do if Surface can't access a visible network:
If you attempt to connect to a visible network and are unable to do so, the first piece of information you need to confirm is the network password. Not inputting or using the correct password is the most common issue when attempting to connect to a network. If you are sure you are using the correct network security key, then try bringing Surface closer to the wireless router and then see if you can connect. If you can connect when it is closer to the router, then you need to extend your wireless signal using a wireless extender or move your router to a different location.
What to do if you cannot access a network that is not broadcasting its network name or SSID:
Diagnosing a wireless connection to a router that is not broadcasting its name or SSID can be very challenging. If you have access to the administration console of the wireless router, the easiest way to fix this is to enable the broadcasting of the SSID while you connect to it. This will allow you to make sure Surface is in the router's wireless range as well as make sure you are using the correct wireless SSID. Once you create the wireless connection profile, you can then disable the SSID and Surface will still continue to connect to it.
What to do if you cannot access the Internet when connected to a wireless network:
If the Surface shows that it is connected to a wireless router, but you are unable to connect to the Internet, you first need to make sure that your Internet connection is actually working. To do this, test your connection from another device on your wireless network or a computer that is hard wired into the router. If those devices are not working as well, then you know that it is a problem with your Internet connection. In those cases, you should first restart the Internet modem you received from your cable or Internet provider. After that has been reset, you should then reset your wireless router. If your Internet connection still does not work, you should call your Internet provider.
On the other hand, if other devices on your network can access the Internet, it could be an issue with Surface's wireless connection profile for this network. To test this, simply Forget the network and recreate it using the steps above.
How to determine the quality of the Surface wireless connection:
Surface offers 5 levels or wireless signal quality with 5 bars being the best and 0 bars being unusable. To determine the quality of your Wi-Fi connection, you can open the Charm Bar and then click on the Settings option. At the bottom you will see the name of the network you are connected to and the wireless signal quality. The five quality levels are shown from best to worst as, with the lower the level being the worst connection speed.
No comments:
Post a Comment